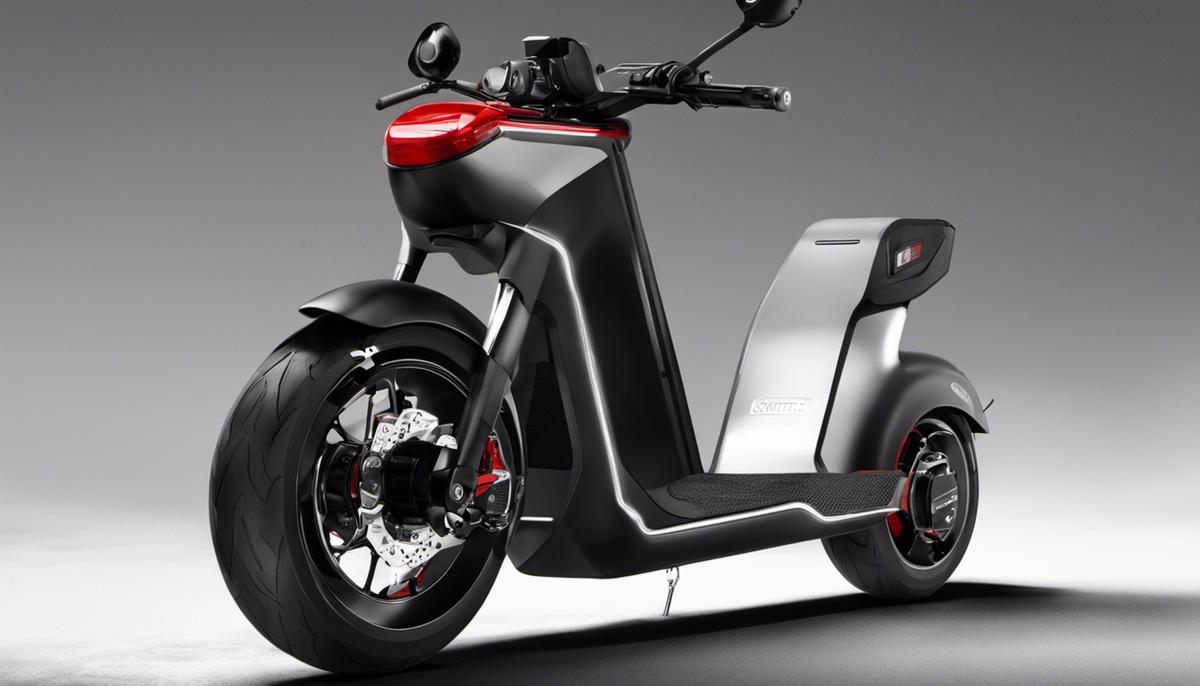
Whether for commuting or recreational use, the Obarter Scooter is an excellent mode of personal transportation that offers both convenience and portability. However, to get the most from this cutting-edge scooter, proper assembly is paramount. This piece aims to provide detailed step-by-step instructions on Obarter Scooter assembly, from understanding its components, through the unboxing, preparation, and actual assembly, to post-assembly safety checks and maintenance regime. This guide serves not only to help you put together your Obarter Scooter, but also to empower you with the understanding of how each component plays its role in the scooter’s overall performance.
Understanding Obarter Scooter Components
Understanding Handlebars on an Obarter Scooter
When we speak of the handlebars on an Obarter Scooter, we’re talking about more than just the physical bars you hold onto while riding. This component encompasses the brake levers, the accelerator, and the bell. This all-in-one setup offers riders the convenience of essential controls within a thumb’s reach. The handlebars can also be adjusted for height to ensure the rider’s comfort.
Obarter Scooter Wheels
Obarter Scooters typically have large wheels, seemingly disproportionate to its compact size. Don’t let these fool you. The large diameter of these wheels, often air-filled, is intentionally designed to offer riders greater stability and smoother rides, even on rough terrain. They also have a higher resistance to wear and tear compared to smaller wheel offerings.
Unpacking Brakes on an Obarter Scooter
Understand that Obarter scooters come equipped with high-quality brakes, both rear and front. The braking system is often drum style or disc style, with the advantage of requiring minimal user maintenance. Riders should get familiar with the resistance and responsiveness of the brakes in a safe and controlled environment before tackling busier settings. It’s also vital to perform regular brake spot checks to ensure their optimal performance.
The Scooter Deck
The deck is the flat part of the scooter where you stand when riding. Some riders may overlook this essential component, but the deck contributes significantly to the scooter’s safety, comfort, and overall performance. Obarter scooter decks are spacious, often featuring a grippy material for added stability, reducing the risks of slipping off when riding.
Battery and Motor on an Obarter Scooter
The heart of an electric scooter like Obarter lies in its battery and motor. The motor provides the power for movement, while the battery stores the energy necessary for the motor. The power of these components will directly influence the scooter’s speed and range. On an Obarter Scooter, the battery, and motor are usually tucked away inside the deck to protect them from damage.

Unboxing and Preparation
Unboxing Your Obarter Scooter
Upon receiving your Obarter Scooter, the first step would be to carefully unbox it. Make sure you do this on a flat and spacious surface to ensure that all parts are visible and accounted for. Use a pair of scissors or a box cutter to open the packaging securely, making sure not to damage any of the parts inside.
Once you have opened the box, remove all parts carefully. This would typically include the scooter itself, battery, a charger, and various tools and equipment necessary for the assembly. Consult the checklist present in the manual and ensure that all the parts listed there are present and undamaged.
Preparation for Assembly
The next step in preparing for Obarter Scooter assembly is to gather your tools. Often, the necessary tools such as a wrench and screwdriver set are included with the scooter. If not, make sure that you have all the necessary tools in your possession to avoid any disruptions during assembly.
Workspace Set Up
Before you commence assembly, it is crucial to have a well-prepared workspace. The location should be spacious, well-lit, and free of clutter. This not only aids in the easy identification and retrieval of parts but also provides ample room to manoeuvre the various components of the scooter.
Ensure that the workspace is also safe for assembly. This means keeping the area free from obstructions and potential accidents like loose wires or spilled liquids. It’s also advisable to work on a non-scratch surface or lay down a mat to protect both the scooter parts and the floor.
Gathering All Components
Once your workspace is ready, lay out all the scooter parts on the mat or working surface according to how they’ll be used in the assembly. Having an organized workspace will help the assembly process to be much faster and smoother.
By ensuring you have all the components and tools necessary, as well as a well-prepared workspace, you’re setting yourself up for a successful and hassle-free assembly process of your new Obarter Scooter. It’s also crucial to read through the assembly instructions in the user manual before beginning the assembly to familiarize yourself with the process and ensure you have a thorough understanding of every step along the way.

Assembling the Obarter Scooter
Step One: Unpack the Components
Start by carefully taking out all components from the box, ensuring you keep them in a safe spot. You should find the main body of the Obarter scooter, the handlebars, the front wheel, tools (including an Allen wrench), and the instruction manual.
Step Two: Attach the Handlebars
Next, attach the handlebar to the main body. Slide it into the socket provided, making sure it aligns correctly. Using the tools provided, secure the handlebars by tightening the screws. It’s crucial not to over-tighten these screws as this could damage the scooter.
Step Three: Install the Front Wheel
Before installing the front wheel, ensure the brake is functioning correctly. You should be able to press it down without any resistance. Now, take the front wheel and slide it into the slot below the handlebars. Secure it with the provided screws, tightening with the tools provided, again making sure not to over-tighten.
Step Four: Test the Wheels
Ensure the wheel alignment is correct by pushing the scooter forward slightly. Both wheels should move smoothly and straight. If you notice any misalignment, adjust the tightening of the screws accordingly until the desired balance is achieved.
Step Five: Check the Brakes
Always check the brakes before using the scooter. The brake lever should be on your left handlebar. Pull it and push the scooter forward to ensure the brake is functioning properly. If it’s not, refer to the instruction manual on how to adjust the brakes.
Step Six: Inflate Tires if Necessary
A well-inflated tire provides a smoother and safer ride. Check the tires of the Obarter scooter. If they feel hard enough and appear well-rounded, they’re okay. If they give easily to pressure, they might need inflation. The recommended air pressure is usually printed on the side of the tire.
Step Seven: Secure all Fastenings
Finally, secure all the screws, nuts, and bolts on the Obarter scooter. This avoids any loose components while riding.
Remember to regularly check these steps for a safe and comfortable ride. Always refer to the instruction manual provided for any detailed instructions or trouble-shooting guides. Each Obarter scooter model may have additional unique features to be set up. Enjoy your ride safely!

Safety Checks and Testing
Assembly and Safety Checks: Obarter Scooter
Upon completion of assembling your Obarter Scooter, it is critical to conduct a thorough safety check to ensure all parts are correctly installed and operate properly.
To begin, carry out a physical inspection of the scooter for any visible deformities, dirt, or damage on the scooter’s structure. This can include the frame, handles, and wheels. Any concerns should be addressed and corrected before the scooter is used.
Brake functionality is an essential aspect of scooter safety. Test the brakes by pushing the scooter forward and applying both the front and back brakes. The scooter should come to a smooth stop when either or both brakes are engaged. The brake pads should also be checked to ensure they align with the surface of the wheel rims. If the scooter does not stop effectively or the brake pads appear to be misaligned, you might need to adjust the brakes for better performance.
Handlebars and Wheel Tests: Obarter Scooter
Next, conduct a test of the handlebars to make sure they are securely fixed. Hold onto the scooter’s hand grips, and pull and twist them firmly. The grips should remain unyielding under force, confirming that they are fastened securely.
Now, check the wheels by lifting the scooter off the ground and spinning each wheel separately. They should rotate smoothly and evenly, without any wobbling or undue friction.
Ensure that the wheel bolts are securely attached. You can check this by attempting to wiggle the wheel side to side. If there is any movement, this indicates the bolts need to be tightened. Any obstruction or issue causing the wheels to not spin freely could pose significant safety risks.
Functionality Tests: Obarter Scooter
After assembly and safety checks, it is essential to conduct a functionality test.
Start by standing on the scooter and pushing off with your foot. It should glide smoothly. Test turning left and right and confirm that the scooter responds appropriately to your movements.
Test the scooter’s braking mechanism by riding at a moderate speed and then applying the brakes. The brakes should respond immediately, bringing the scooter to a smooth but swift halt.
By fully inspecting your Obarter Scooter after assembly and conducting thorough safety and functionality tests, you can help ensure a safe and enjoyable ride. If any problems are encountered during testing, consult the scooter’s manual or contact the manufacturer for advice on how to rectify the issue.

Maintenance and Care
Preparation before Assembly
Before beginning the assembly of your Obarter scooter, familiarize yourself with all the components. Also, ensure you have the necessary tools at hand. Usually, a screw driver and a wrench should suffice. Always remember to wear protective gear, like gloves, to protect your hands during the assembly process.
Obarter Scooter Assembly
Start by securing the front wheel into position. Once confirmed it is correctly centered, proceed to tighten the wheel using your wrench. Next, attach the scooter’s handlebars into the relevant slot on the scooter. Ensure they are correctly aligned and fixed firmly. The brake should be on the left side. If your model has a seat, fasten it onto the deck of the skateboard. Ensure all bolts are thoroughly tightened for safety.
Battery Charging
The battery is an essential part of your Obarter scooter. Always charge it fully before the first use. Regular charging extends your battery life and ensures a smooth ride. To charge, plug the battery charger into an electrical outlet and connect the other end to the scooter’s charging port. It typically takes 4-6 hours for a full charge. Remember to disconnect the charger once your scooter is fully charged to prevent overcharging.
Cleaning and Lubricating
Maintaining an overall clean scooter promotes longevity and ensures a smoother ride. You can clean the scooter with a soft damp cloth, avoiding any kind of water exposure to the electronic components. Additionally, lubricating your scooter components, such as the wheel bearings and hinges, is essential. Use a suitable scooter lubricant and apply sparingly to these parts every few months or when they appear to be drying out.
Changing Parts
Eventually, certain parts of your Obarter scooter may wear down and need replacing. This may include tires, brake pads, or lights. It is important to check these parts regularly for wear and tear. Replacement is usually straightforward – simply remove the worn-out part and install the new one according to the manufacturer’s instructions. Always use official Obarter replacement parts to ensure compatibility and optimal performance.
Addressing minor issues
For minor issues like squeaky brakes or loose handlebars, usually a simple adjustment or tightening of screws can solve the problem. If your scooter is not turning on, ensure the battery is fully charged and properly connected. It’s good to refer to the user manual or contact Obarter’s customer service for troubleshooting help before resorting to professional repair services.
Remember, regular scooter inspections and maintenance will significantly prolong the life of your Obarter scooter and enhance your riding experience. Always comply with Obarter’s recommended maintenance procedures and safety guidelines.

Once you’ve successfully assembled your Obarter Scooter and ensured it’s safe and ready to go, the final piece of the puzzle is learning about the care and maintenance required to stay safe and deliver top performance. This includes regular cleaning, lubricating the moving parts, timely charging the battery, replacing worn-out parts, and troubleshooting minor glitches. With this comprehensive understanding and the ability to execute what’s been shared in this guide, you will have not only a ready-to-use scooter but ownership experience that is as smooth and efficient as the ride on your Obarter Scooter itself.

